


- July 4, 2022
- Posted by: Santhosh Kesavan and Jeba PonSelvasingh
- Category: Application Engineering

Build Or Buy?
That’s the traditional question that has plagued IT leaders for a very long time. While the traditional approach has always been to build, with the advent of SaaS products the equation changed a bit owing to many conveniences that SaaS products provide. While one may be tempted to believe that’s a happy ending, its rarely the case with the ever-evolving technology landscape.
Enter Low code! The most convenient way to build custom apps, enable citizen development, test out business ideas and workflows with a very rudimentary tech team. Low code capabilities have evolved over the years, enabling developers to build enterprise grade apps, with all the bells and whistles of enhanced security, single sign-on functions, and deployment in cloud of their choice.
Now here’s another extension that low-code app development solutions can provide – building custom widgets.
Talk to our experts today to know how Indium can make this powerful low-code technology work for your business, so that you can keep innovating for your customers.
Get in touch
Custom Widgets
Specifically in the case of Mendix, custom widgets are a part of the user interface in your Mendix app that enables functionality and interaction with the users of the app.
These custom widgets bridge the gap between using standard Mendix components (for example, buttons and list views) and creating very specific components yourself. A custom widget gives you a solution if you need a specific user experience that Mendix does not provide out of the box.
This blog provides end-to-end details on the how and what of custom widget creation and how to manage the some of the common issues arising in the process.
Pre-requisites
- A good knowledge of JavaScript and Typescript design patterns.
- Beginner-level knowledge of how React applications work.
- The latest version of NodeJS needs to be installed. The most preferable version is 14.16. Any version which is greater than 14.16 and less than 17 should work seamlessly.
- Install an IDE for your choice and the most preferable is Microsoft Visual Studio Code.
Widget Creation Process
Before starting on how to create the custom widget, we need to complete the following installation:
- Open the nodeJS command prompt from the start menu.
- Install the Yeoman with the following command in the command prompt
- $ npm install -g yo
- Install the Mendix Pluggable Widget Generator with the following command:
- $ npm install -g @mendix/generator-widget
This is a good read: Using a Low Code Development Platform (LCDP) like Mendix for Business Transformation
Now we are going to create an EMI Calculator widget on a blank Mendix application. The widget should calculate Monthly EMI based on the interest and months selected from the UI.
a) Creating a Blank App:
Open Mendix Studio Pro and create a new test app by selecting File > New App from the top menu bar and then Blank App. Make sure the application is up and running without any errors.
b) Creating a Blank Widget:
- The pluggable widget generator which helps to generate the widget
- NodeJS command prompt and navigate to the folder where the Mendix recommended folder structure and files.
- Open the app is created.
- It is safe to create the custom widgets within the Mendix app folder structure. If we are creating the widget outside our current application, then we need to link that folder with our current application. Even though it is not a tedious process it’s better to create the widget within the application.
- Make a new folder by using the following command
- .mkdir customWidgets.
- .cd customWidgets
- Now create the custom widget by using the following command.
- .yo @mendix/widget EmiCalculator
- The widget generator will ask you a few questions as shown in the pic below
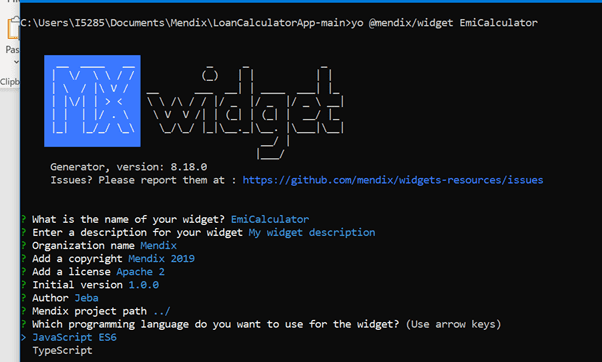
- As shown in the image above, we need to select what programming language we need to develop.
- Then we need to select what type of widget based on our requirements.

- Also, there is an option to select the template. We need to select the empty widget template.
- For the final two options that are related to unit testing, kindly give the option as ‘N’. We are not going to perform any unit testing in the widget as of now.
- Once the widget is created you need to navigate inside the widget folder.
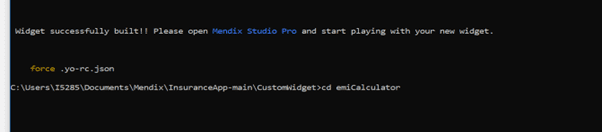

- The project folder structure will look like the below and straight away you can delete the files which are highlighted in the image.


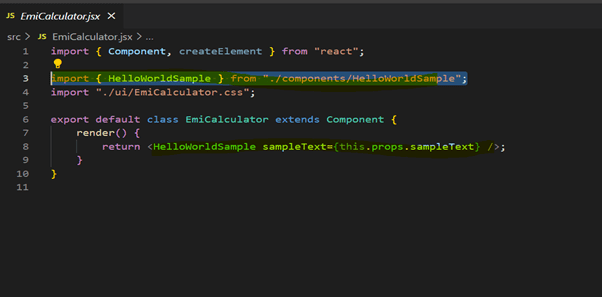
After deleting the files, open the emicalculator.jsx file and remove the dependencies from the script file as below

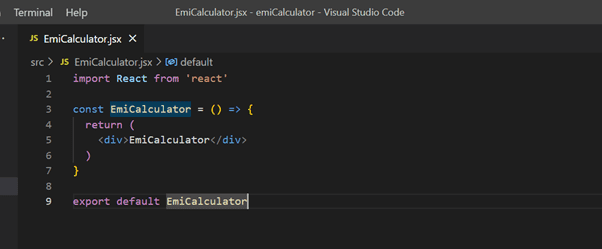
c) Modifying the Script:
- Now we can modify the script based on our needs. In our case, we are going to develop the widget based on JavaScript. So, we have modified the code as follows:

- Now on the command prompt give the following command à npm run build. This will build the application. After running the command, synchronize the folders by clicking the F4 button. Now you should be able to see our custom widget under the widget menu.
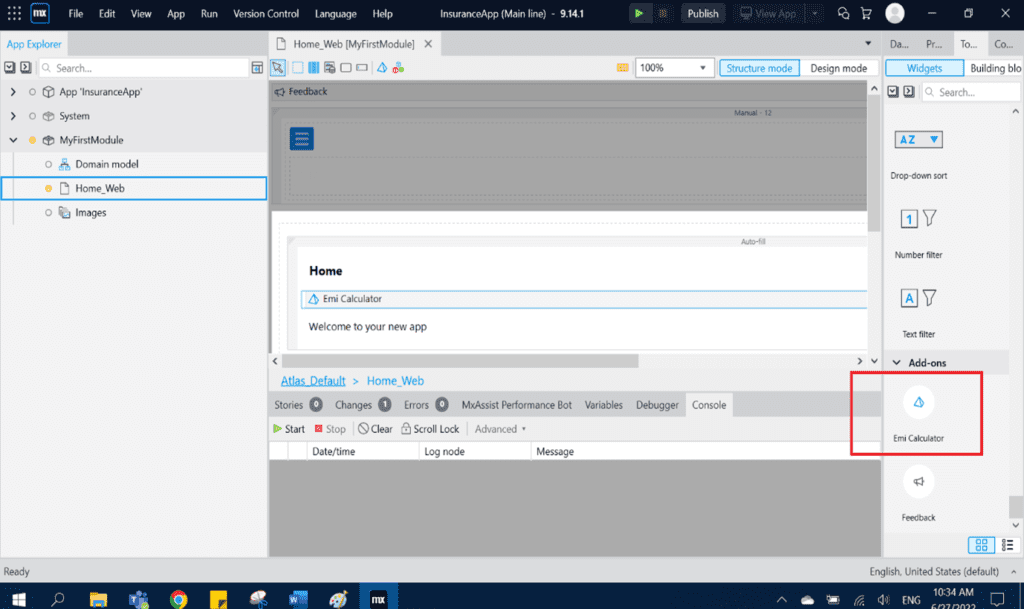

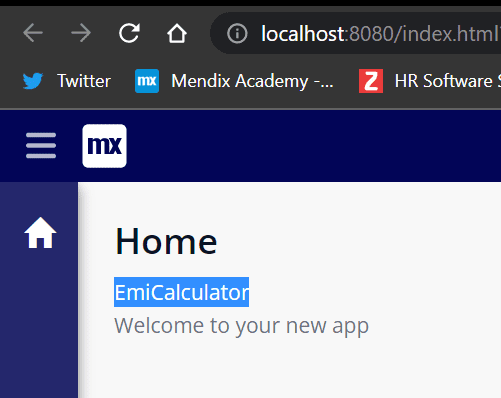
Now you can place the widget on your pages, and you can start using it. After running the project, you can your widget on your screen.

d) Explaining the Code:
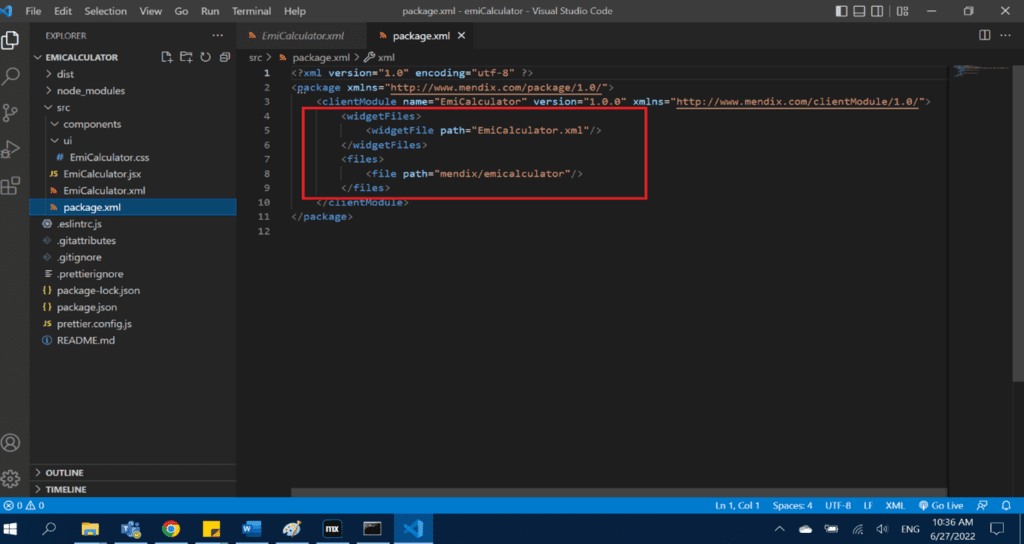
- The package.xml is the starting point of the widget. It redirects to EmiCalculator.xml.

- The property pluginWidget=true will make the widget work with the new widget API
- The property needsEntityContext=true is set up to allow the attribute to be taken from the context
- The property of the type attribute only allows the selection of string attributes from the domain model
- The typescript typing based on the XML will be generated automatically. Start the development process with the following command:
npm start. This process will bundle the widget and generate the properties into typings/<filename>. - The Properties section is explained in section 3.4

- Now in EmiCalculator.jsx modify the code as below
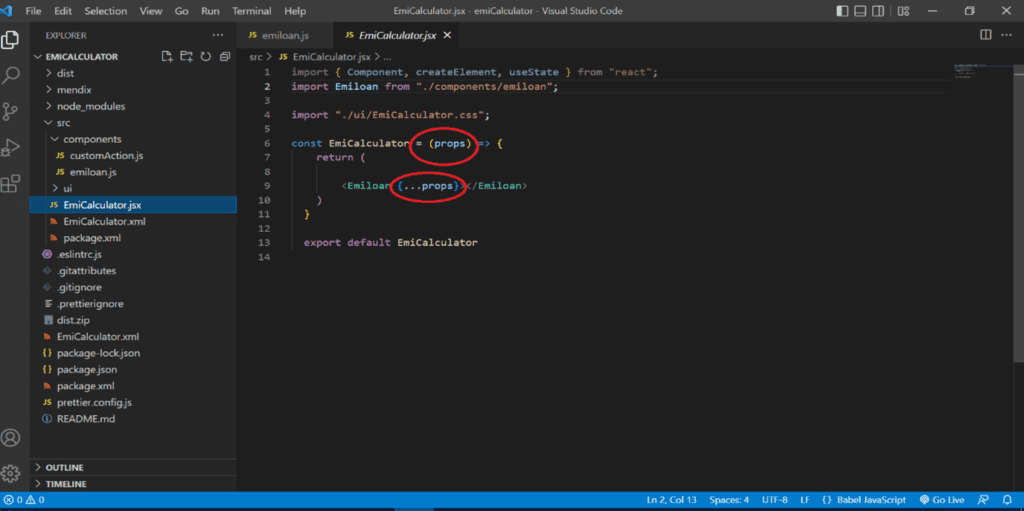 The props in the code give all the properties that are passed from the XML. We can access the properties of the XML data via these props.
- As we can see from the screenshot above, we have created a new file Emiloan and have passed the props values to that file.
- Now in the Emiloan file modify the code as below. Now build the widget and run the application. You can start using your EMI calculator widget.
- Now Build the widget and run the application. Your widget is ready for Use.
  const Emiloan = (props) => {
    //  setting up values in reactjs
    let [months, setMonths] = useState(0);
    let [interestRate, setInterestRate] = useState(0.0);
    let [amount, setAmount] = useState(0);
    let [totalAmount, setTotalAmount] = useState(0);
    let [totalInterest, setTotalInterest] = useState(0.0);
    let [finalAmount, setFinalAmount] = useState(0.0);
    const slidersLabels = ['Interest Rate', 'Months'];
    // custom action like click events and passing data
    const {onAdd, onEdit, onRemove, payload, setPayload} = customAction(props)
    const onValueChange = (e) => {
        setInterestRate(parseFloat(e.target.value));
        totalAmountCalculation(amount, months, parseFloat(e.target.value));
    }
    const onValueChangeMonths = (e) => {
        setMonths(parseInt(e.target.value));
        totalAmountCalculation(amount, parseInt(e.target.value), interestRate);
    }
    const onchangeInput = (e) => {
        setAmount(parseInt(e.target.value));
        totalAmountCalculation(parseInt(e.target.value), months, interestRate);
    }
    const totalAmountCalculation = (amount, months, interestRate) => {
        if (amount != 0 && months!= 0 && interestRate!= 0) {
            let interest = (amount * interestRate)/months;

            setTotalInterest(interest.toFixed(2));
            let total = ((amount/months) + interest);
            setTotalAmount(total.toFixed(2));
            let finalTotalAmountPaid = total.toFixed(2) * months;
            setFinalAmount(finalTotalAmountPaid);
        } else {
            setTotalAmount(0);
        }
    }
  return (
const Emiloan = (props) => {
    //  setting up values in reactjs
    let [months, setMonths] = useState(0);
    let [interestRate, setInterestRate] = useState(0.0);
    let [amount, setAmount] = useState(0);
    let [totalAmount, setTotalAmount] = useState(0);
    let [totalInterest, setTotalInterest] = useState(0.0);
    let [finalAmount, setFinalAmount] = useState(0.0);
    const slidersLabels = ['Interest Rate', 'Months'];
    // custom action like click events and passing data
    const {onAdd, onEdit, onRemove, payload, setPayload} = customAction(props)
    const onValueChange = (e) => {
        setInterestRate(parseFloat(e.target.value));
        totalAmountCalculation(amount, months, parseFloat(e.target.value));
    }
    const onValueChangeMonths = (e) => {
        setMonths(parseInt(e.target.value));
        totalAmountCalculation(amount, parseInt(e.target.value), interestRate);
    }
    const onchangeInput = (e) => {
        setAmount(parseInt(e.target.value));
        totalAmountCalculation(parseInt(e.target.value), months, interestRate);
    }
    const totalAmountCalculation = (amount, months, interestRate) => {
        if (amount != 0 && months!= 0 && interestRate!= 0) {
            let interest = (amount * interestRate)/months;

            setTotalInterest(interest.toFixed(2));
            let total = ((amount/months) + interest);
            setTotalAmount(total.toFixed(2));
            let finalTotalAmountPaid = total.toFixed(2) * months;
            setFinalAmount(finalTotalAmountPaid);
        } else {
            setTotalAmount(0);
        }
    }
  return (
   <div><span>
        Enter Amount
    </span>
        <div>
            <input style={{
                width: "250px",
                height: "30px",
                color: "red"
            }} type="number" value={amount} onChange={(e) => onchangeInput(e)}></input>
        </div>

        <div>
            {slidersLabels[0]} - {interestRate} %
            <input style={{
                width: "50%"
            }}
                id={slidersLabels[0]}
                type="range"
                step="0.01"
                min="0" max="50" value={interestRate}
                onChange={(e) => onValueChange(e)}
                />
        </div>
        <div>
            {slidersLabels[1]}  {months}
            <input style={{
                width: "50%"
            }}
                id={slidersLabels[1]}
                type="range"
                defaultValue="0"  value={months}
                min="0" max="100"
                onChange={(e) => onValueChangeMonths(e)}
                step="1" />
        </div>
        <div>
            <span>Monthly Payment  : </span> {totalAmount}
        </div>
        <div>
            <span>Total Amount To be Paid : </span> {finalAmount.toFixed(2)}
        </div>
    </div>
  )
}
e) XML Configurations:
- Before starting this part, we should have a basic understanding of how XML works.
- An XML file always starts with the XML version and encoding declaration.
- Our widget declaration XML starts at the
<widget>element. This is the root element that will contain all our settings for this widget - Any properties you define in your widget XML file can be set using Mendix Studio Pro and they will be passed to your JavaScript file, so you can use them in your widget.
- The following examples show how the XML hast to declare to get various functions in Mendix.
- Data Source: To pass the data source we need to follow the following syntax:
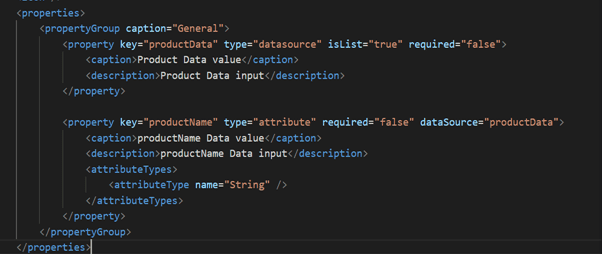
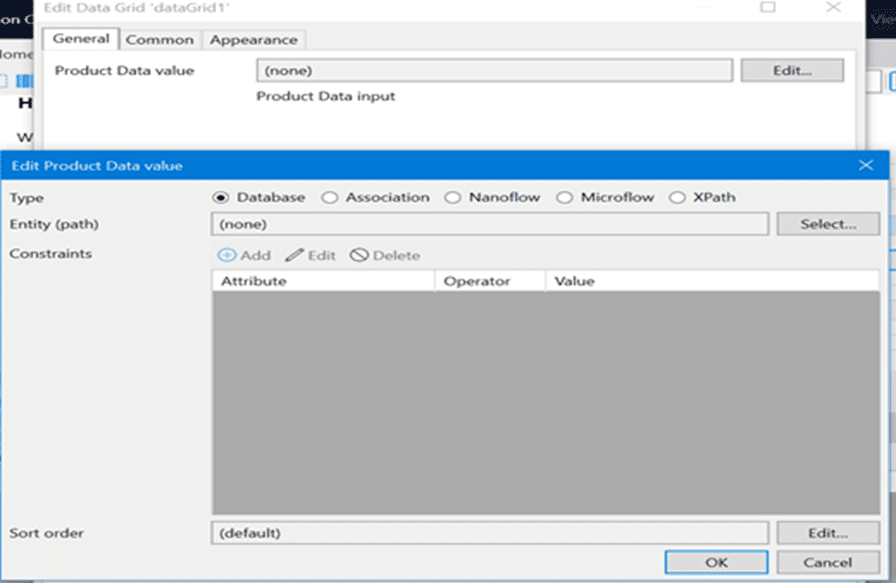
- Expression: To pass the Expression we need to follow the following syntax:
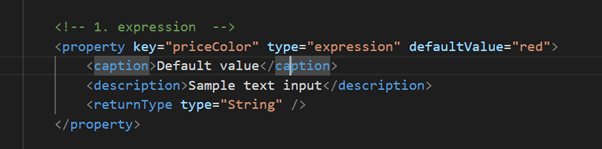
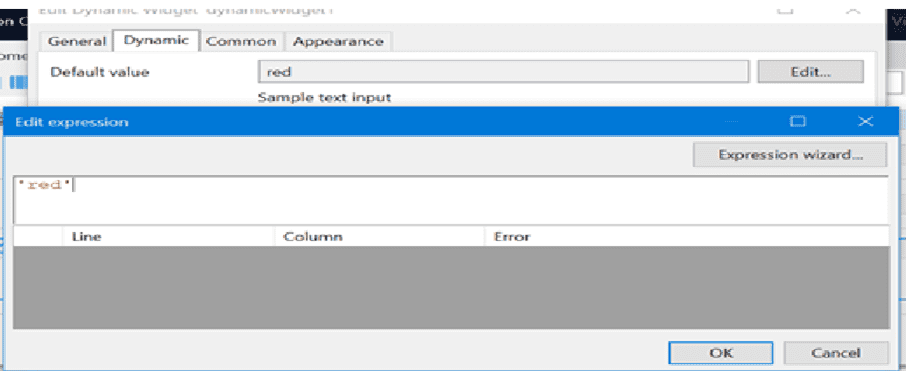
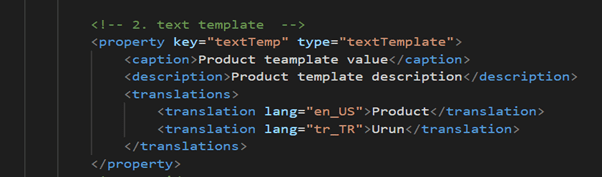
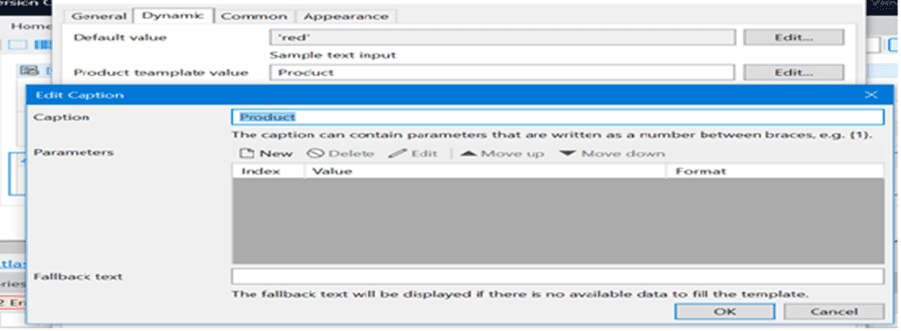
- Text Template: To pass the template we need to follow the following syntax:

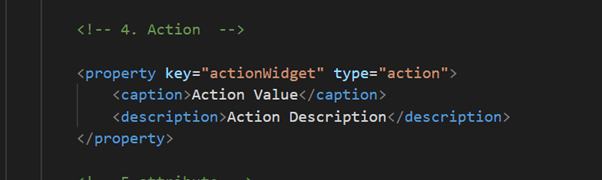
 Action: To have a specific action on various events, we need to follow the following syntax


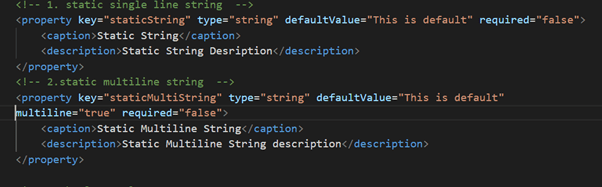
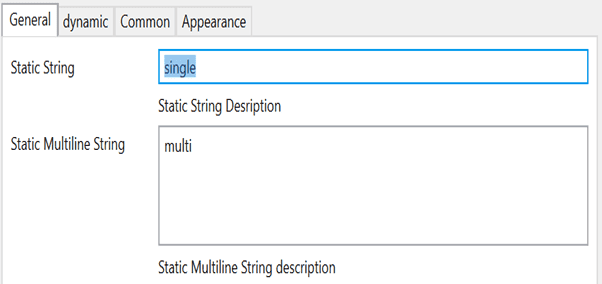
- Static Multi and Single line: This is to pass the static values.

Boolean Value: This is to pass the Boolean value


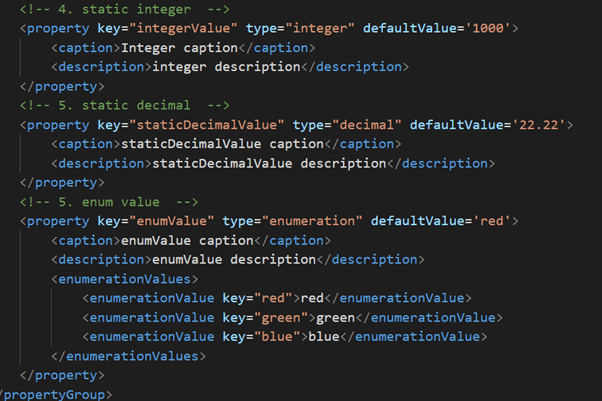
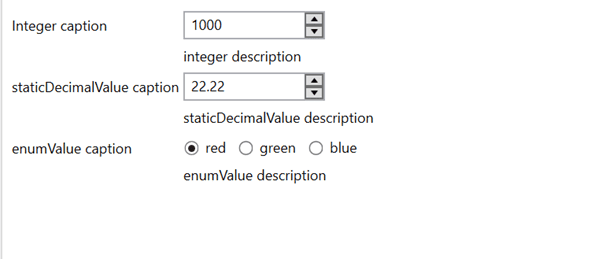
Static Integer, Static Decimal, and Enum Values:


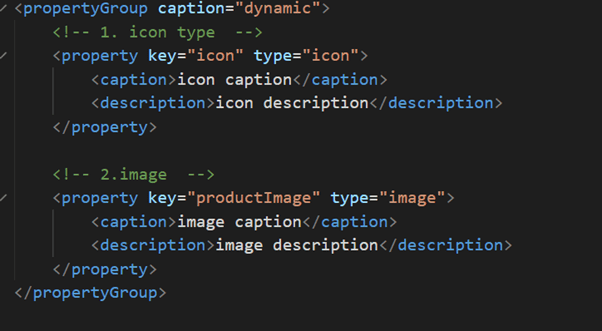
Icon and Image:
 Issues Faced During Development
- Node installation Issue: The Node Version 17 installation was done in the system, but I’m unable to generate the widget. The system throws an error saying the node is not compatible with the current version of the widget generator.
- (i) Solution -> Downgrade the node version and tried again it works.
- (ii) Solution -> Try to use the node version 14.16 which is a stable version from nodeJS, which is better than the new node versions
- 2.XML Configurations: The XML configurations need to be mapped correctly or else the widget will throw an error while loading.
- Solution -> Need to have a basic understanding of how XML works.
- Solution -> Map the fields correctly.
Add-Ons
- We can integrate any external API in the widgets.
- Third-party integrations are possible. We have integrated the Kendo-react UI into our widgets, and it works fine.
Learn how Indium helped a middle eastern government services company build applications using Mendix
As a Mendix development partner for over 5 years, Indium provides the best-in-class Mendix services such as Mendix Architecture and Design, Rapid Custom Application Development, Indium Integrations Foundry for Mendix, Data Migration and Deployment and Mendix QA Services.